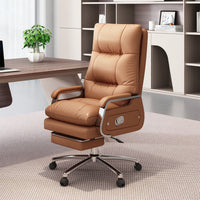

An executive desk can fit inside the room and still make the office frustrating to use. The chair may strike a credenza, a file drawer may open into the user's legs, or the only route to the door may disappear whenever the user rolls back. These conflicts rarely appear in a product width-and-depth comparison.
The useful question is not simply whether an executive desk fits. It is whether the desk, chair, storage, doors, people, and cables can occupy the same room in the positions required during a normal workday.
Why a Desk Can Fit but the Office Still Fails
A floor plan often shows every item in its smallest state. The chair is pushed under the desk, credenza doors are closed, drawers are shut, and the room door is drawn at only one point in its swing. That is a storage diagram, not an operating test.
The failure appears when two actions happen together. The user rolls back while someone enters. A drawer opens while the chair is occupied. A laptop power brick projects from the wall behind a cabinet. A guest walks behind the chair during a video call. Each item technically fits, but their movement zones overlap.
Measure Three Operating Envelopes
1. Closed Footprint
Record the desk's overall depth at its deepest point, not only the main work surface. Include modesty panels, curved tops, legs, returns, handles, and any rear cable cover that projects beyond the listed case dimensions. Measure rear storage to the wall-side face, including the gap required by baseboards or plugs.
2. Occupied Working Envelope
Place the intended chair at the user's normal keyboard position. Sit in it, recline as the user normally would, and roll back far enough to stand without twisting around an armrest. Mark the farthest caster and seat-back positions on the floor. This field measurement is more useful than chair width alone.
3. Access and Service Envelope
Open every drawer, cabinet door, and room door that could affect the desk area. Add the path used by the user, visitors, cleaning staff, and anyone accessing outlets or data ports. Some service access is occasional; a route to the room door is continuous. Label them differently instead of hiding both inside one clearance number.

Calculate the Rear Zone Before Comparing Desks
The fastest measurement is the clear distance from the rear edge of the selected desk to the nearest obstruction at the narrowest point. If the office is still empty, calculate it from the room depth:
Available rear zone = finished room depth - front-side zone - desk overall depth - rear storage overall depth
Use finished dimensions measured above the baseboard, and define the front-side zone before using the formula. It may contain guest chairs, a door approach, or nothing more than a wall. A furniture plan that spends the same inches twice is not a plan.
Here is an illustrative check. A room is 168 inches deep. The planned visitor side uses 62 inches, the selected desk is 38 inches deep, and a credenza needs 21 inches including its wall gap. The rear zone is 47 inches. If a taped chair test needs 48 inches for the actual user to stand, the layout already fails before allowing for measurement error or an open drawer. The answer is to change the plan, not to assume the user will move differently after installation.
| Layout condition | What to measure | Failure to prevent |
|---|---|---|
| Desk near a rear wall | Desk edge to wall at the narrowest point | Chair back or casters striking the wall |
| Desk with a credenza | Desk edge to closed credenza, then to its open door or drawer | Storage becoming unusable while the chair is occupied |
| L-shaped desk with pedestal | Chair movement against the return and every drawer extension | User trapped between the return and rear storage |
| Desk near a room door | Full door swing plus the user's exit position | Door contacting the chair or blocking egress |
| Shared path behind the user | Occupied chair position plus the path required by the project | Passing traffic forcing the user into the desk |
Test the Actual Chair, Not a Catalog Rectangle
Measure the Chair in Use
Chair depth changes when the user reclines, adjusts lumbar support, or slides the seat. Casters also extend beyond the seat outline and may move differently on carpet than on a hard floor. Use the intended office chair, or a taped mockup that matches its overall depth and caster base, before approving the desk position.
Test the Stand-Up Motion
Ask the primary user to work at the mock desk, push back, rotate, and stand. Mark the farthest position reached without asking the person to squeeze sideways. Repeat with the chair at the user's preferred height because armrests may hit the desktop before the back reaches the wall. General OSHA workstation guidance also emphasizes adequate space for component placement and changes in working posture; the real movement test translates that principle into the room.
Plan Rear Storage and Desk Returns as Moving Parts
A Closed Credenza Is Not a Working Credenza
A credenza behind the desk consumes its own body depth, wall gap, handle projection, and door or drawer extension. Measure the fully open position of the widest moving part. If storage is used several times a day, test it with the user still seated. If it is archival storage, occasional chair movement may be acceptable, but that tradeoff should be deliberate.
Do not assume sliding doors solve every conflict. They reduce door swing, but open drawers, pull-out printer shelves, and cable access can still enter the chair zone. Compare the selected file cabinet drawing rather than using the depth of a similar model.
Check the Return and Pedestal Together
On an L-shaped desk, the return limits rotation on one side while a pedestal or side cabinet may limit it on the other. Check the exact left-return or right-return variant, then open each drawer while the chair is at the keyboard position and at the stand-up position. A reversible-looking product image does not prove that drawers, power modules, or modesty panels can switch sides.
Protect Doors, Visitors, and Shared Routes
Test Door Swing and Guest Movement at the Same Time
Open the room door fully, place guest chairs where they will actually sit, and move the executive chair to its exit position. If the door contacts a chair, if a visitor must pass through the user's caster zone, or if the user becomes boxed in when both guest chairs are occupied, change the desk orientation or remove an item.
Separate Comfort Clearance From Route Requirements
A comfortable chair zone is not automatically an accessible route, and a code minimum is not automatically a comfortable working setup.
If the path behind the desk serves an accessible route, exit, or required work-area approach, follow the requirements identified for the project. The U.S. Access Board recommends planning moveable furnishings so they do not encroach on accessible routes and clearances. See its guidance on furnishings and accessible routes and coordinate with the responsible designer or authority for the specific site.

Include Power, Data, Vents, and Baseboards
Wall-Fed Connections
A desk or credenza placed tight to a wall may crush plugs, kink data cables, cover an outlet, or leave no hand access for reconnection. Measure the plug body and cable bend behind the furniture. If a power strip is mounted under the desk, verify that its cord reaches the outlet without crossing the chair's casters or the doorway.
Floor Boxes and Building Services
Mark every floor box, wall outlet, thermostat, return-air grille, radiator, and service panel on the same tape layout. A floor box under a solid pedestal may be inaccessible after assembly. A credenza covering a vent may also force the cabinet farther into the room than the floor plan shows. Do not order from furniture dimensions alone when building services determine the final position.
Tape Out the Office at Full Scale
- Mark the finished room boundaries, baseboards, columns, doors, outlets, and vents.
- Tape the desk and rear storage at their maximum overall depths, including wall gaps and handles.
- Place the actual chair, or mark its caster base and reclined seat-back position.
- Open a box or taped panel to represent every full drawer and door extension.
- Walk the real routes with the chair occupied, the room door open, and visitor chairs in place.
Photograph the finished mockup with a tape measure visible. That record is useful when comparing variants or asking a seller to confirm a dimension. Keep a small installation tolerance for uneven walls, baseboards, and measuring error; a plan that works only when every line is exact is too tight.
Verify These Details Before Ordering
- Exact SKU, size, finish, and left- or right-hand configuration shown on the order.
- Maximum desktop depth, including curves, returns, modesty panels, and cable covers.
- Chair overall depth, caster-base diameter, recline position, and armrest height range.
- Credenza or cabinet depth including handles, wall gap, and fully open drawers or doors.
- Whether drawers, power modules, and storage components are fixed or reversible.
- Assembly sequence and whether the finished desk can be positioned without blocking installers.
- Delivery path and packaging dimensions if the room has tight doors, turns, or elevators.
- The room measurements and product dimensions shown in the seller's current instructions.
Anzhap's FAQ page notes that product dimensions and assembly information should be checked and recommends allowing clearance for chairs, walking, and cabinet doors. Save the selected product page and verify the exact variant rather than relying on a category image.
Common Mistakes That Survive a Floor Plan
- Using desktop depth but omitting the return, handle, or rear cable cover.
- Measuring an empty chair instead of the primary user standing up from it.
- Treating the credenza as a wall and never drawing its open storage position.
- Keeping a path clear only when the executive chair is pushed under the desk.
- Assuming a left/right configuration can be reversed after delivery.
- Putting a pedestal or modesty panel over a floor box.
- Losing the last inch to a baseboard, plug, or uneven wall.
Frequently Asked Questions
Is There One Standard Space Behind an Executive Desk?
No. Chairs, users, storage, doors, and routes vary. Use actual product dimensions and a full-scale chair test; apply project requirements separately to any code- or accessibility-controlled route.
Can a Credenza Sit Directly Behind the Chair?
Yes, if the occupied and stand-up chair positions remain clear and the needed doors or drawers open. Test frequently used storage with the user seated.
Does an L-Shaped Desk Need More Rear Clearance?
Not always, but the return restricts lateral escape. Test chair rotation, drawer access, and the selected return orientation together.
What If the Desk Fits but the Chair Test Fails?
Change one variable: use a shallower desk or credenza, move storage, reverse the layout when permitted, choose a smaller tested chair envelope, or reduce front-side furniture.
Final Check Before Checkout
Choose the layout only after the chair, storage, door, and route work together. If a critical dimension is missing, contact Anzhap with the exact SKU, then compare confirmed dimensions in the executive office desk collection before ordering.