
An L-shaped desk can have the right finish, storage and overall dimensions and still be wrong for the room. The problem is often the return: the shorter work surface extends into the doorway, consumes the only practical guest-chair position, or places a file drawer where it cannot open. Correcting that error after delivery may require a rebuild, a different cabinet or a replacement desk.
This guide explains how to compare a left return vs right return desk before ordering. If you are still choosing a product type or size, start with Anzhap's L-shaped executive desk collection and its broader manager desk collection, then use the checks below to eliminate configurations that the room cannot support.
Quick Definition: Left Return vs. Right Return
The main desk is the longer work surface. The return is the shorter surface that creates the L. Many commercial furniture sellers describe the return from the seated user's position: a left-return desk extends to the user's left, and a right-return desk extends to the user's right.
That convention is useful, but it is not universal. A listing may use the viewer's perspective, a plan-view label, or a factory-specific SKU. Some product photos are also mirrored or show several variants in one gallery. Do not approve an order from the words "left" or "right" alone. Match the variant to a top-view diagram showing the chair position, or ask the seller to mark the return on the drawing.

Why the Product Photo Can Mislead You
A three-quarter product photo is designed to show the finish and storage, not to prove orientation. Perspective can hide which edge is longer. A low cabinet may appear separate even when it carries the return, and a drawer front can face the camera while its usable opening faces the wall in the proposed room.
Check the plan drawing, dimensioned image and variant selector together. On a product described as left or right interchangeable, identify which components actually move. A reversible desktop does not automatically mean that the pedestal, lock, drawer openings, modesty panel, grommets and cable-control switches all work equally well on either side. Anzhap's general guide to L-shaped executive desks can help with the wider buying decision, but the room-specific orientation still needs its own approval.
Mark the Complete Desk Footprint
Room width and desk width are not enough. Make a top-view plan at one consistent scale and mark the assembled footprint of every part that touches or occupies the floor. Include the main top, return, supporting cabinet, modesty panel, end panels and any overhang.
Next, add operational space rather than generic clearance:
- Draw each drawer and cabinet door fully open, using the actual opening direction.
- Draw the desk chair in the working position and pulled back far enough to stand.
- Place guest chairs where a visitor can sit without entering the user's chair zone.
- Show the door leaf and its complete swing, not only the doorway opening.
- Mark outlets, data points, floor vents, radiators and wall projections that cannot move.
Painter's tape is useful only if it shows both arms of the L and the cabinet faces. A single rectangle around the maximum width can hide the open inside corner, which is often where the chair needs to move.
Compare the Two Orientations
The table below gives a first orientation to test. It is not a rule. The final answer must also pass storage, power, window and assembly checks.
| Room condition | Orientation to test first | What to verify |
|---|---|---|
| Entry is on the user's left | Right return | Visitors clear the outside return corner and can reach a guest chair |
| Entry is on the user's right | Left return | Visitors clear the outside return corner and can reach a guest chair |
| One long wall is usable | Return along that wall | No conflict with windows, radiators, outlets or opening drawers |
| Power is on one side | Return near the service side | Grommets, cable entry and any control module can reach that source |
| Office may be reassigned | Reversible configuration | Cabinet, modesty panel, cable parts and lock access also reverse |
Left-Return Layout
A left return often works when the entry and visitor path are on the user's right. It can put secondary equipment or active paperwork on the user's left while keeping the main approach open. Before choosing it, check whether a left-side cabinet door will face a wall and whether the return will cover the room's only practical power source.
Right-Return Layout
A right return often works when people enter from the user's left. It may also suit a room where the right wall is the only uninterrupted surface. Confirm that the return does not place a monitor directly in window glare or trap a right-side file drawer behind a guest chair.
Reversible Layout
A reversible L-shaped desk reduces ordering risk only when the selection can still be made during installation. It does not make room constraints disappear. Record the chosen side on the installer plan so the crew does not assemble the easiest factory orientation and discover the doorway conflict afterward.
Check Doorways and Visitor Traffic
The critical measurement is not the gap between the return and the wall. It is the path a person actually takes from the door to the guest chair. Draw that path as a continuous band. If it clips the outside corner of the return, the desk will feel intrusive even when the remaining gap appears adequate.
Test the door at full swing and at the position where someone naturally pauses to close it. Also check whether a visitor standing beside the guest chair blocks the user's exit. In a private office, the best orientation usually lets visitors reach their seats without walking behind the user or through the user's rolling-chair zone.

Protect Storage and Drawer Access
Storage is often what makes the return effectively fixed. A supporting cabinet may have outward-facing drawers, a hinged door, a lock on one face and cable access on the other. Rotating the desktop cannot correct a cabinet that opens into a wall.
Add the open drawer depth to the plan and test it while the desk chair is occupied. Then place the proposed file cabinet. Two drawers that technically open can still be impractical if opening one blocks the other or forces the user to move a guest chair every time.
Check the least visible functions before approval: lock location, shelf adjustment, cable-entry holes, power-control access and the space needed to remove a drawer for service. If the return includes a long storage unit, ask for a straight-on cabinet elevation as well as the top view.
Plan Monitors, Windows and Video Calls
The return should support equipment zones, not simply fill the longest wall. Place monitors, docking hardware, a printer and frequently used documents on the plan before deciding which side looks cleaner.
Monitor Zone
Keep the main monitor close to the user's forward sightline. A return is useful for a second work zone, but placing the only monitor far down one arm turns the chair repeatedly and wastes the main surface. If two monitors sit near the inside corner, check that their stands and cable exits fit without covering a grommet.
Window and Glare
Draw the window, then test morning and afternoon light directions. A monitor directly facing a bright window can create glare; a window directly behind the monitor can create a strong brightness contrast. The better return side may be the one that lets the screen sit roughly perpendicular to the window while preserving the entry path.
Video-Call Background
Mark the camera's view cone from the likely monitor position. One orientation may show the open door or a high-traffic corridor behind the user. The other may frame a controlled wall or storage area. This is a functional reason to rotate the L, but it should not override door clearance or accessible storage.
Locate Power Before Choosing a Side
Trace the cable path from the wall or floor source to the actual desk entry. Do not measure only the straight-line distance. The usable path may need to pass through a cabinet, rise inside a panel and reach a grommet without crossing the visitor route.
Product configurations can place cable openings or control modules on one cabinet face. For example, verify the selected orientation and storage option on a minimalist interchangeable L-shaped desk or a luxury L-shaped desk with cable management rather than assuming the listing title resolves the service path.
Leave enough access to connect and replace power adapters after installation. A cable route that works only before the desk is pushed against the wall is not serviceable.
Fixed-Return vs. Reversible Desks
The product construction determines how much flexibility remains after purchase. Treat "fixed" and "reversible" as assembly conditions, not style descriptions.
Fixed-Return Desk
A fixed-return desk uses handed parts, predrilled connections or a supporting cabinet that belongs on one side. The order should state the model, return direction and viewing convention. A mismatched fixed return normally cannot be corrected by turning the desk around because the user opening, modesty panel and storage faces change with it.
Reversible Desk
A reversible desk allows at least the return surface to be assembled on either side. Ask which steps must be repeated to switch later. If the change requires removing the top, moving the cabinet, rerouting cables and drilling no new holes, it is reversible but not casually movable. Confirm whether the lock, drawers, grommets and power controls remain accessible in both approved arrangements.
Use the Five-Minute Floor Test
Run this test before the order is released, even when a designer has already prepared a furniture plan.
- Stand at the room entrance and tape the main top, return and supporting cabinet at full scale.
- Swing the door, walk to each guest chair and walk back out without stepping through the user's chair zone.
- Place the desk chair, roll back to stand and open every taped drawer or door to its full depth.
- Set boxes where monitors and equipment will sit, then check window glare, camera background and sightlines to visitors.
- Trace the real cable path to the outlet and photograph both tested orientations from the doorway.
Keep the photographs with the approved plan. They give purchasing and installation teams a faster reference than a written note saying "return on the right."
Frequently Asked Questions
Does Handedness Determine the Return Side?
Usually no. A right-handed user may prefer writing space on the right, but door location, storage access and power are harder constraints. First choose the orientation the room can support. Then place movable accessories and task zones to suit the user's dominant hand.
Can I Change the Return Side After Assembly?
Only if the exact model is designed for it, and even then the change may require substantial disassembly. Check the assembly instructions and the orientation of storage, modesty panels, cable entries and locks. Do not drill new holes or alter structural parts unless the manufacturer specifically authorizes that method.
Choose the Side the Room Can Support
The safest order record contains a top-view room plan, the seated-user position, the model and variant or SKU, the chosen return side, drawer and door directions, cable-entry location and written confirmation of how left and right are defined. Add the installer-facing photograph from the doorway so the intended setup is difficult to misread.
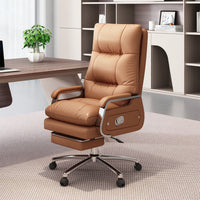
Complete the plan with an appropriately scaled executive chair, including its pulled-back position. If the product diagram or reversible parts remain unclear, send the room plan and selected variant to Anzhap's contact team for confirmation before ordering. The correct L-shaped desk orientation is the one that keeps the room usable after every drawer is open, every chair is occupied and every cable is connected.